:rotate(0)/k1zwxoj0a2a22hpbd5pxep84ch1v)
Process Post
Chris Preller and 2 OthersEvy DibbleMadeline Tallarico
:rotate(0)/k1zwxoj0a2a22hpbd5pxep84ch1v)
NuVu users Rhino6. The trial version will function fully for 90 days in trial mode.
Download Rhino
Enter your email in order to download the program.
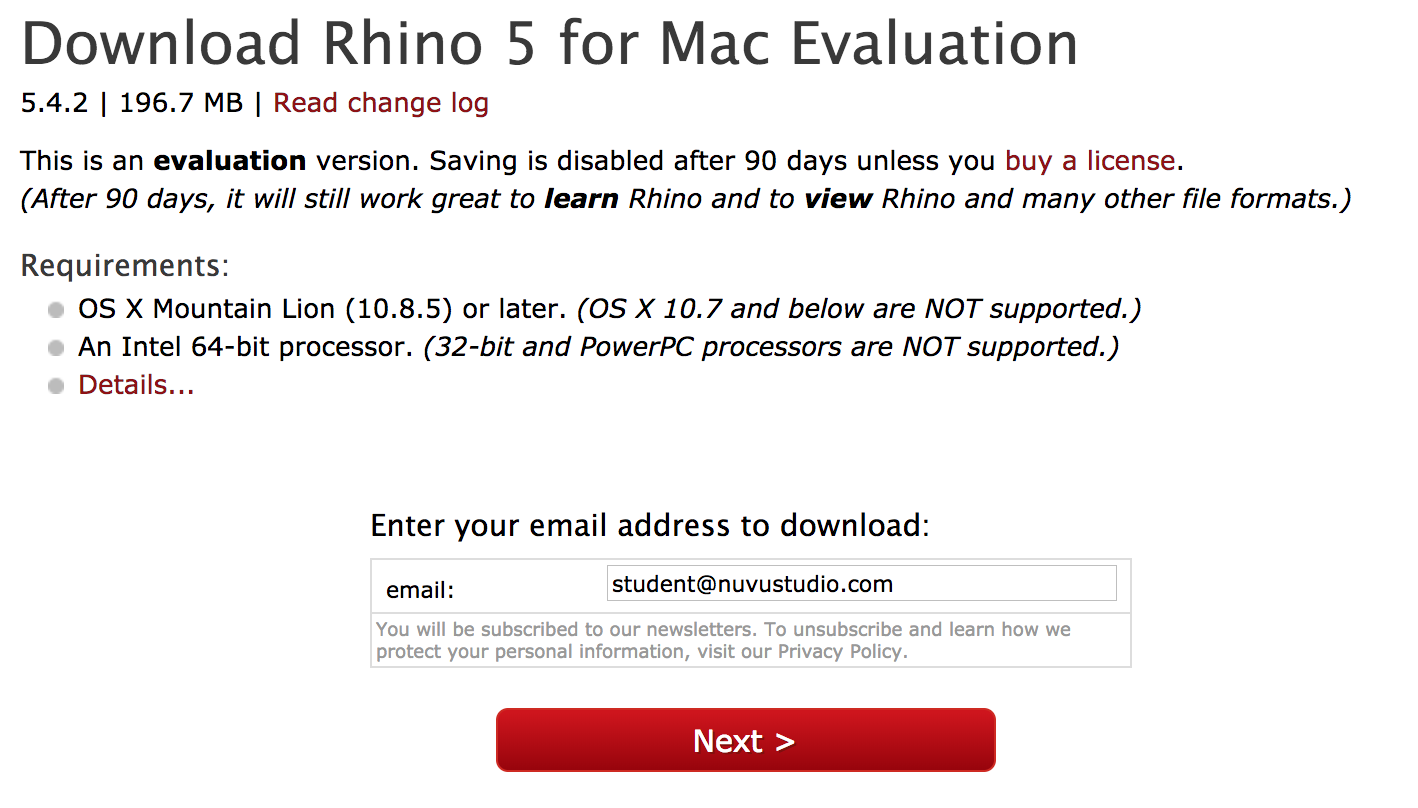
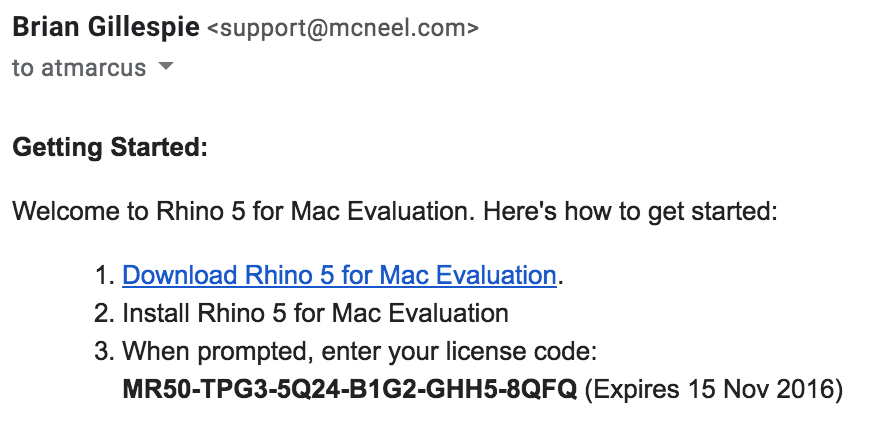
You will receive an email with license information.
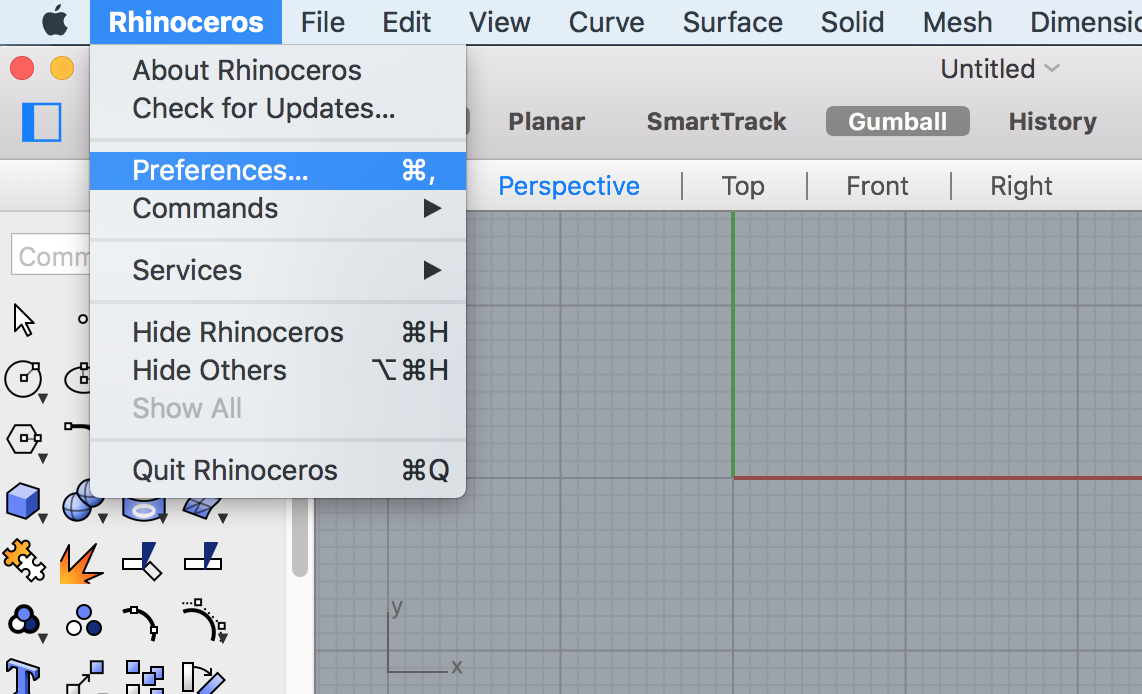
In Rhino, go to Preferences (or Options on a PC)
Select Licences
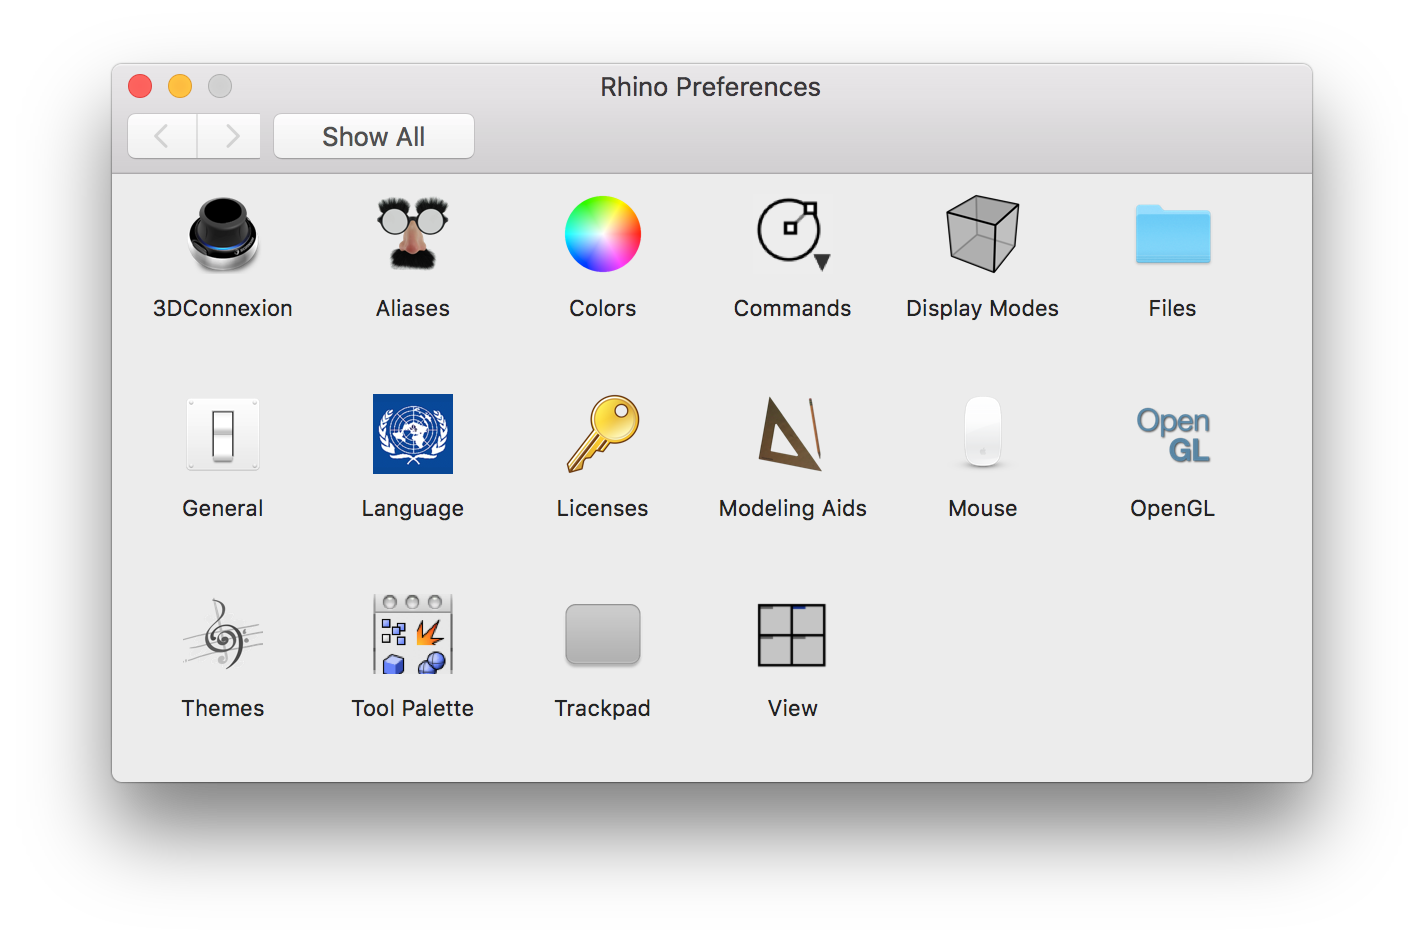
Copy and paste the information provided to you in the email
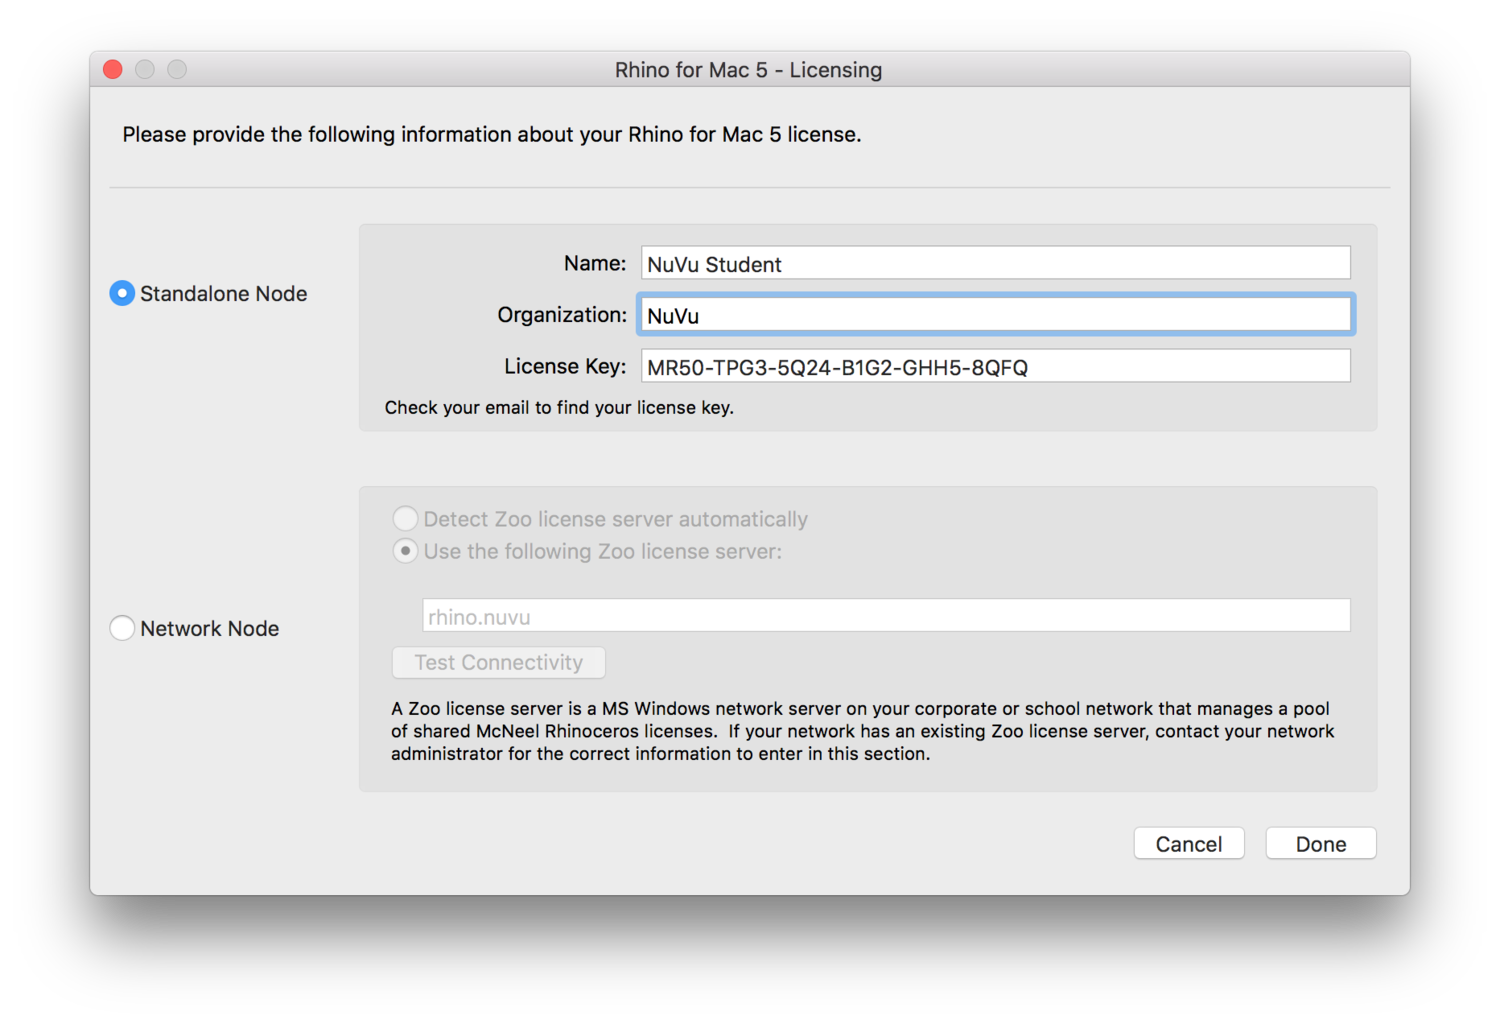
Click Done. You are good to go for 90 days!
All users can use NuVu's cloud service to share files for lasercutting and between collaborators. There are two options for accessing NextCloud, on the Web or through a client. Using the desktop client is preferable, but if you have issues, the web client works as well.
Desktop Client
Web Client

 for the folder, choose "share with Nextcloud" and share it with the user name provided by your Coach.
Assignment:
The purpose of this post is to synthesize and document your progress for your most recent classes. Depending on your school, you will complete this every weekend or as instructed by your coach. This is not merely a report of what you’ve done but an analysis of your work culminating in a clear statement of your direction for the project. You must include todays documentation in this post. This homework should take ~1 hour to complete.
Example:
The Slime Shade
Thesis: The Slime Shade is a living window shade that supports sustainability through an integrated home bioreactor. It provides solar heat gain reduction and generates biofuel in the home through the use of active algae production in a complex heat-sealed ecosystem.
We decided to continue with the Slime Shade project and want to focus on improving the environmental conditions for growth through further development of the habitat as well as improving on the aesthetic design and figuring out how to both transport and draw off algae for biofuel.
We began by growing a small sample of algae so that we can collect some data over the course of the studio on its growth rate. Tim gave us feedback on ideal growth conditions and we wanted to try things out in a controlled environment.
In our previous version we struggled with meeting aesthetic, mobility, and habitat requirements for the actual shade and wanted to address these issues first. We looked at various shade designs and discussed what types of patterns would meet all three criteria. We felt like corners would trap a lot of algae so we may want to avoid 90-degree angles and began working with hexagons. We also talked about whether the shade itself should be at a constant pressure versus a model system that uses solenoids and can have inter-changing parts. We are leaning towards a modular system. Andrew offered some feedback about pooling and ease of raising and lowering shades, so we began exploring how cutting edges of the hexagons could make things move more smoothly, both in terms of fluid flow and raising and lowering the shade.
Simultaneous with exploring shade patterns, we began to investigate how we would seal the plastic as this was a major hindrance in our original design. We began by modifying a soldering iron with a steel ball roller to allow for more precise control. We found that the all-steel roller bearing did not heat up sufficiently and ordered an aluminum roller which we thought would work better. We also wanted more control over the roller and Tim suggested that we use try to create an attachment for the CNC mill that would let us have computer control. We made a new prototype of the sealer. We tried brazing the metals together, but stainless and copper don't like each other so they didn't bond. We then blasted it into submission with the welder. It also didn't work well because the stainless is so thin, but it kinda stays together so it's good enough.We designed the CNC attachment to fit inside the dust collector shroud and to allow for even pressure without breaking. When the roller arrived, we tested our system on the CNC. After a few tries it worked great. We created a sample flow pattern and filled it with algae and it held!
All of our work is supporting our original idea. Now that we have the CNC attachment, we need to go back to refining the geometry of the shade and optimizing for ease of raising and lowering and algal growth. We also need to begin looking at the overall design and the pumping systems. On Monday Stefani will begin the pump redesign and Nathan will continue to work on the patterning.
In order to finish the project we need to finalize the pattern, decide if the shade moves (and figure out how best to do it - automatic or manual), completely redesign the frame and pump system, figure out how to get the algae out and what to do with it, run the pattern through the CNC, hook everything up, and put it all together! That is overwhelming! I am not sure if we will be able to address the biofuel extraction, but that may we able to be done in another project. We might be able to simplify things - it could be that the shade does not need to be raised or lowered at all!
Assignment:
The purpose of this post is to synthesize and document your progress for your most recent studio. This should be an analysis of your work from this week culminating in a clear statement of your direction for the project. You must include todays documentation in this post. This homework should take ~1 hour to complete.
Example:
Home Base
At the beginning of this week, Roison and I were partnered up due to our interest in making an Emoto-bot that either relayed a family members emotions, or proximity to the other family members or making a device that had the ability to connect two separated people with a light that allowed them to send a light message.
These goals lead to our first 3 ideas. Our first idea was a light board that has a light for each member that indicated to the family how that family member is feeling through the color of the light. This would be controlled with either an app or a control panel. The purpose behind this board is to let family members that are away or in college let the family know how they're doing and for anyone to check in on them. Our second idea was the same board that would instead show the proximity to the house of each family member. This would be indicated by the brightness of the light. The purpose of this would be to know who is home or in the area. The third idea was a pair of lights that two people would have that could relay a message through a light that was controlled by the number of taps one of the people gave the lamp.
This lead to a combination of two of these, which is a family lamp that would have different circle lights for each family member and would move clockwise based on their proximity to the house. If everyone was home the lights would line up in a straight line. If someone was out of the house, this lamp would also have the ability to send a light message to their circle, showing the family they are thinking of them. This eventually evolved into being a tree in which each family member was represented by a branch that can move up and down depending on how close they are. When all the family members are home the tree will twist as if excited that they are united.
Some feedback that we got was thinking about where these devices would be used and how to incorporate parameters for light. Another piece of feedback we got was to get the lamp to act excited.
Our steps for this week are to focus on the technical aspects because we are pretty confident on the base of our idea. Before that we also want to make a prototype that is more mechanized.
The purpose of the daily post is to document the progress for the day. You will do this through the following post types:
Documentation
In the Documentation tab, each team member should post images of the work they completed over the course of the day. This includes ideas that came out of your mind - sketches, images of prototypes, renders or screenshots of digital designs, storyboards, etc. Every image must have a Title and Caption. See the example in the Gallery of this post.
Title - What is the image of? Be specific in terms of the version and content.
ex - Shade prototype 1, Initial storyboard, 3D Model of Shade Connection.
Caption - What aspect of your design process does the image capture and how did it inform your process?
ex - Exploring mobility of hexagons. We noticed that in order to raise the shade, many hexagons would need to become trapezoids.
Precedents
Precedent research is a fundamental part of the creative process, providing context, inspiration, and technical guidance. It is work that came out of someone else's mind. In the Precedents Tab, each team member should post precedents applicable to the current stage of design. While you need not have a new precedent every day, be sure to include them each time you make substantive technical or design changes.
You can read more about Precedents here.
Things to consider:
Student will use the NuVu Studio Management Platform for all documentation and presentation over the course of the studio. Student Documentation is important to NuVu’s Studios as it creates a clear trace of the development of projects and understanding of students’ processes. Documentation helps students to internalize the iterative nature of the design process through self-awareness and reflection on their constantly refining their ideas and prototypes while receiving and synthesizing feedback from Coaches and experts.
Daily documentation (via blog posts on the NuVu Studio Management Platform) includes posting and labeling scans of sketches, posting of precedents, and photographs of current stages of design. Periodic summary posts require students to synthesize and document their progress through an analysis of their work culminating in a clear statement of your direction for the project. Students are encouraged to reflect on their own work and coach feedback, synthesize the feedback as it relates to their project, decide on a course of action, and make an updated iteration.
Login

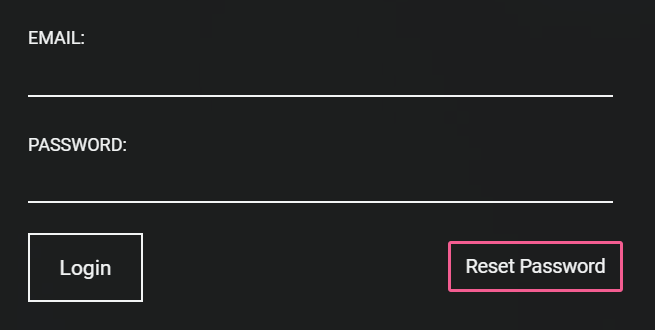
Creating Posts
The site is post based. In general every post should have visual content. If you are posting a link to a website with images or a video, you should post some of the images directly onto the platform. The information below applies to all areas of content creation.
Note: You cannot combine photos and videos in a single post.

Adding Content to posts


Editing Posts
After a post is published you can edit the post by clicking on the little gear icon on the top right hand side of the post. You can
