:rotate(0)/oqc9cvp2jtd4xjgqn6arm53x0zi3)
Segmented Vehicle Demonstration Video
Rosa Weinberg and 3 OthersJae LeeCindy HUANG
Samson Mostashari
Our world is mountainous with difficult terrain to traverse. The ‘Segmented Mountain Climber’ is able to deftly maneuver up and down the steep mountainsides, and over their sharp peaks. Its Whegs, half wheel half legs, are able to climb over both small rocks and large boulders. It can also quickly reverse, turn and is able to continue movement even if flipped upside down.
Our original idea was a mountainous world with difficult terrain to traverse. We started by brainstorming many different models that could help climb mountains. We decided on a segmented car which could work best in a mountainous situation by conforming to the landscape. It’s called ‘Segmented Mountain Climber’.
During the first few days, we thought of various shapes for the vehicle, drawing inspiration from existing creations including roller coasters, snakes and trains. Then we brainstormed various designs for the wheels, including tank treads, legs, many small wheels, and large powered wheels.
In order to better visualize the connections and turning of the segments, we made our first prototype of the large-wheeled model. In essence, it was just a trio of cardboard boxes tied together with string, with an axle and pair of wheels through each segment. However, some clear problems came up: the connection was not sturdy enough, and the wheels failed to rotate. We discussed at length how to incorporate the right wheels and connectors into our design. We started looking at other possible wheel choices, and then we settled on wegs. A weg is essentially a spoked wheel with the rim removed. Deriving its name from the words "wheel" and "leg," it could use circular motion, but with legs. Compared to traditional wheels, they could climb over obstructions and had superior grip. We also decided to replace the strings. At first, we had considered ball joints by virtue of their versatility, however we chose to nix the ball joints in favor of universal joints, because they could be better incorporated into the segments. Universal joints are basically two axles intersecting at a point, offering flexibility in two dimensions. Furthermore, the ability to transfer torque is exclusive to universal joints, so they could prevent any one segment from falling over.
Taking these considerations into account, we replaced the string and wheels on our prototype with universal joints and wegs. Upon finishing, we realized that the wegs in the prototype had the right structure but would not rotate because of the material (cardboard), the number of legs (4), and the structure of the foot. We decided that a 6-legged wooden weg would work better, and we redesigned the shape of the foot to include rubber that could provide traction. Another problem was the turning, we considered models such as rack-and-pinion, which was too delicate and complicated, and exploiting right-and-left rotation differences, which wouldn't work as well in a multi-car design such as ours. We decided on using a servo to rotate the first compartment relative to the others, turning the rest in due course. We didn't know, however, how we could incorporate the servo into the overall design. We decided that the joints would be included into the design of the car segments, and the servo would be attached to the foremost universal joint via a 3D-printed attachment. Unfortunately, a problem inherent to servos was the elimination of one of the two axes of rotation; as a result, the first and second compartments would always stay firm on uneven ground.
Finally, after considering all these issues, we crafted the final product, learning from our previous errors. We used wood, which is much sturdier than cardboard; we used wegs, capable of scaling obstacles, and we used a servo to turn and manipulate the vehicle. We connected the motors and servo to an Arduino controlled by a remote. Overall, we had many separate design challenges; in the end, however, all the components came together to form a polished final product.
Things to do/think about:
Absolutely no more than 9 Slides!
1 Title/Intention Slide. For build projects, describe the Problem and Solution. For conceptual projects this can be expressed as Intention/Solution. The slide should include the name of the project and a one sentence statement of both the problem and the solution.
1 Concept Sketch. This should be a clean sketch of your initial ideas. If you do not have a nice drawing or lost yours, create one now!
2 Iteration Slides. These slides should show early prototypes of your design. Focus on big changes. You do not need to show tiny changes.
2-3 Final Slides. These should show clean images of your final project (these should be taken in the photo booth).
The text of your post should have a strong narrative that ties together the Why, How and What of your project through clear, cogent writing. Tell the story of how your idea was born, developed, and manifest.
The text should include the following 2 items:
Things to think about:
Here is an example from Penelope the Pain-O-Monster:
Pediatricians and other doctors find it challenging to collect accurate self reported information from children about their level of pain due to lack of communication skills, fear, anxiety, and discomfort. Traditional 1-10 pain scales do not fully address these issues, often leading to uncomfortable children and inaccurate symptom information. Penelope the Pain-O-Monster is a cute plush toy that uses integrated pressure sensors to allow children to express their source and level of pain through play.
Our previous project, The EmoOwl, helped children with autism to express themselves by translating motion into color. As we sought to expand our children’s health menagerie, we thought about making a different stuffed animal to help kids in hospitals. We quickly realized that the pain charts that patients used to express their pain could be made more interactive and easier for a child to use. We read that playing with stuffed animals can take the children’s mind off the pain so we created an additional “Fun” mode to distraction from pain and anxiety. The handcrafted stuffed animal uses force sensors in different body parts that light up from blue to red depending on how hard they are pushed to show the child’s pain level. It is our hope that Penelope will help sick children feel safer while providing more useful information to care providers. We anticipate that Penelope and the EmOwl will soon have many more friends to help improve healthcare for kids.
Upload a short video showing your project in action. Do not count on your project working as you expect during the presentation.
There is a new generation of go-karts that are breaking ground. They are futuristic, designed with sleek, lightweight materials like carbon fiber, sensor-infused for quick navigation, precision-assembled, and compact so they can fit into the trunk of a car! One of the highlights of our Summer term, students will then test drive these hand-built vehicles in an exciting studio finale race that is sure to draw a crowd!
In this studio, you’ll be working with your peers to design, engineer, and build an E-Go-Kart, or electric go-kart, that will navigate on the roadways of our Nu Grand Prix! As a team, you’ll work on the design of all the elements: chassis, exterior shell, interior cabin, steering apparatus, onboard display, and any other custom features that you can imagine. The style is up to you: futuristic, sci-fi steampunk, fantastical, vintage, geometric, minimalist, or modern-chic. You’ll also use a variety of sensors, such as ultrasonic sensors, color detecting cameras, and pressure sensors, to navigate the course with ease. You’ll be drifting across the Nu Grand Prix in style!
REGISTER HERE!
Focus Skills/Subjects/Technologies:
 Design
 Physics (Electricity, Magnetism)
 Engineering
 Programming
 Electronics
 Robotics (Arduino)
 Sensors & Actuators
 Digital Fabrication (Laser-cutting, 3d Printing)
 3d Modeling
Prerequisites:
REGISTER HERE!
Student will use the NuVu Studio Management Platform for all documentation and presentation over the course of the studio. Student Documentation is important to NuVu’s Studios as it creates a clear trace of the development of projects and understanding of students’ processes. Documentation helps students to internalize the iterative nature of the design process through self-awareness and reflection on their constantly refining their ideas and prototypes while receiving and synthesizing feedback from Coaches and experts.
Daily documentation (via blog posts on the NuVu Studio Management Platform) includes posting and labeling scans of sketches, posting of precedents, and photographs of current stages of design. Periodic summary posts require students to synthesize and document their progress through an analysis of their work culminating in a clear statement of your direction for the project. Students are encouraged to reflect on their own work and coach feedback, synthesize the feedback as it relates to their project, decide on a course of action, and make an updated iteration.
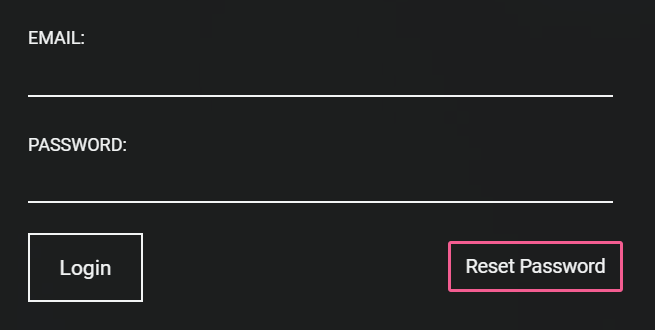
Login

Creating Posts
The site is post based. In general every post should have visual content. If you are posting a link to a website with images or a video, you should post some of the images directly onto the platform. The information below applies to all areas of content creation.
Note: You cannot combine photos and videos in a single post.

Adding Content to posts


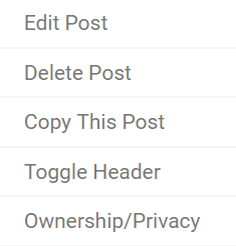
Editing Posts
After a post is published you can edit the post by clicking on the little gear icon on the top right hand side of the post. You can
:rotate(0)/u3n1qdt623gph6xm1dtsg3op63lg)
:rotate(0)/no9sfgbw2rlgmhltqsg3yepcc8r4)
:rotate(0)/4vak3w14u05cp2adek22clelc2ua)
:rotate(0)/p39f1jed4mgd288myquiu5yecweg)