Flying Objects (Session 1 2019)

Using the NuVu Platform

Andrew Todd Marcus

Using the NuVu Platform

Student will use the NuVu Studio Management Platform for all documentation and presentation over the course of the studio. Student Documentation is important to NuVu’s Studios as it creates a clear trace of the development of projects and understanding of students’ processes. Documentation helps students to internalize the iterative nature of the design process through self-awareness and reflection on their constantly refining their ideas and prototypes while receiving and synthesizing feedback from Coaches and experts.

Daily documentation (via blog posts on the NuVu Studio Management Platform) includes posting and labeling scans of sketches, posting of precedents, and photographs of current stages of design. Periodic summary posts require students to synthesize and document their progress through an analysis of their work culminating in a clear statement of your direction for the project. Students are encouraged to reflect on their own work and coach feedback, synthesize the feedback as it relates to their project, decide on a course of action, and make an updated iteration.

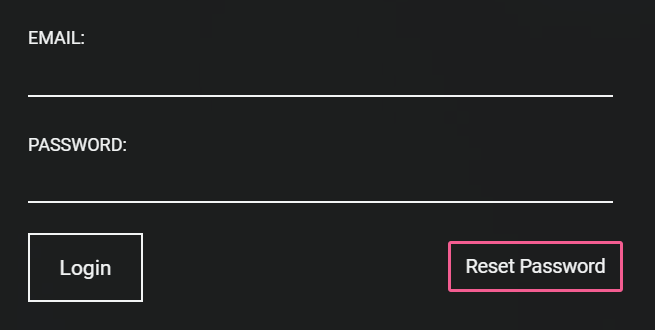
Login

  • Go to your school platform URL: https://yourschool.nuvustudio.com
    • ex:  https://cambridge.nuvustudio.com
  • Click on Login on the top right hand corner of the page
  • Click on “Reset Password”
  • Enter your email address
  • You will get an email with instructions to reset your password (please be sure to check your JUNK folder if the email does not arrive)
  • Click on the link and it will take you to a page where you can create a password.
  • After creating a password, you will be logged in automatically.

Creating Posts

The site is post based. In general every post should have visual content. If you are posting a link to a website with images or a video, you should post some of the images directly onto the platform. The information below applies to all areas of content creation.

Note: You cannot combine photos and videos in a single post.

  • Anytime you want to make a new post simply click inside the box where it says "CREATE A POST".

Adding Content to posts

  • You can add text in the text box and use formatting options.
  • Adding Images
    • Use the Images icon to pick an image from your hard drive
    • Use the Existing Images icon to pick an image from other posts in the current studio from or from another site. Using images from the current studio is vital for assembling weekly post summaries and presentations. 
    • To fetch images from another site, click on Existing Images , then From Another Site and enter the url. Not all sites are compatible with the fetcher, and images must have a minimum resolution of 500px in either direction.
    • Use the Camera Icon to select images from the Photobooth. Photobooth images are automatically uploaded and will appear by date.
    • Once your images are uploaded you can add captions or reorder images. Titles and captions will appear under the image in the post. This is a good tool for presentations and labels.
  • Use the Embed icon to embed YouTube and Vimeo videos and other content. Copy the actual URL of the video or site you wish to embed, NOT the embed code.
  • Use the Files icon to attach a PDF or other file types to your post. Do NOT upload images or videos as files.
  • Use the Videos icon to add a video from your hard drive.
  • Privacy Settings controls who can see the post. Privacy is generally defaulted to the School level.
  • You can choose to disallow Comments if you wish. Comments are default allowed.
  • Clicking on Notify Participants will send your post as an email to everyone in the studio or everyone in the project, depending on where the post resides. Coaches have the option for allowing or disallowing this checkbox, so you may not see it.

Editing Posts

After a post is published you can edit the post by clicking on the little gear icon on the top right hand side of the post. You can

  • Click on Edit to edit the post text; add, reorder, title and caption images; or add new content.
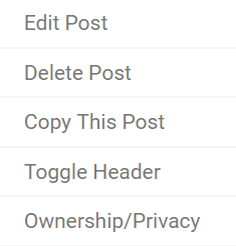
  • Click on Delete to delete the post.
  • Click on Copy to copy the post into memory. You can Paste the post anywhere you have rights to post bu clicking the four bars in the Studio menu and selecting Paste Post.
  • Clock on Toggle Header to turn the header on and off.
  • Click on Ownership & Privacy to Add Collaborators to the post. Collaborators are able to edit the post and add content. Only one person can edit the post at a time.


CD Hovercraft Steps

Rima Das

CD Hovercraft

Chris Perry

Custom Hovercraft Steps

Rima Das

Crafting Hovercraft

Chris Perry

Title: Crafting Hovercraft

Purpose: In this exercise, students will experiment with alternative methods of flight by creating their hovercraft. Students will explore friction and air cushions by designing their own floating devices.

Description: Students will build a standard CD and balloon hovercraft in order to physically experiment with low-friction crafts. After seeing what makes hovercrafts successful, they will design their own hovercraft with the goal of traveling the furthest distance. 

Materials:

  • Balloons 
  • CD
  • Hot Glue
  • Tape
  • PVC pipe section/coupler
  • Straws
  • Foam core

.Instructions: This exercise is broken into 4 parts

  1. Standardized Design - Students will individually fabricate their own CD and balloon hovercraft with the instructions provided.
  2. Rally 1 - Students will test their hovercraft and make observations about how their hovercraft moves compared to each other based on slight variations of attention to tolerances, and craftsmanship of construction.
  3. Customized Racers- Students in groups of two will have free reign to design a hovercraft with any parts on hand at NuVu. They will first create a sketch of their own design and then build their hovercraft based on the drawings. Students will predict how far and how fast their hovercraft will go!
  4. Hovercraft Rally! - Students from all sections will take turns launching their custom hovercraft designs across the floor to see who can go the fastest, and who can go the farthest!


Deliverables: Student groups will create a final post in the Responses tab and post:

  1. 2 photos of their standardized hovercraft (in the Photo Booth and on the ground) w/ predictions and analysis
  2. Sketches of their custom hovercraft design
  3. 2 photos of their custom hovercraft (in the Photo Booth and in on the race track) w/ predictions and analysis

Presentation Instructions

Andrew Todd Marcus

You will be creating your presentation on the NuVu Platform.

Things to do/think about:

  • Your presentation should be located in the Portfolio tab of your project.
  • There should be (1) post titled with The Name of Your Project with all of the slides.
  • You should have (1) post of a video of your project in action. Chances are people wont be able to see your work from and we can project a video of your project working.
  • All slides should have a title. You can add titles when editing the post
  • With the exception of the Title slide NO TEXT SHOULD APPEAR ON YOUR SLIDES.
  • Only (1) image per slide. Images should be uploaded directly. Make sure that the images aren't pixelated! NO GOOGLE DOCS!!!
  • Be sure to add your team members as collaborators and make the (2) posts Public.
  • Only one team member can edit a post at a time!
  • Presentations should be no longer than 3 minutes. PRACTICE!


1st Post : Title this post the Name of Your Project

Absolutely no more than 9 Slides!

1 Title/Intention Slide. For build projects, describe the Problem and Solution. For conceptual projects this can be expressed as Intention/Solution. The slide should include the name of the project and a one sentence statement of both the problem and the solution.

Example:
Segmented Vehicle
Problem: Design a vehicle for a mountainous world with difficult terrain to traverse.
Solution:  A segmented vehicle with a universal joint system handles mountainous terrain by conforming to the landscape.
 
1-2  Precedent Slides
  • One slide to show conceptual idea. 
  • One slide to show mechanical or functional idea.
 

1 Concept Sketch. This should be a clean sketch of your initial ideas. If you do not have a nice drawing or lost yours, create one now!

2 Iteration Slides. These slides should show early prototypes of your design. Focus on big changes. You do not need to show tiny changes.

2-3 Final Slides. These should show clean images of your final project (these should be taken in the photo booth).

Text:

The text of your post should have a strong narrative that ties together the Why, How and What of your project through clear, cogent writing. Tell the story of how your idea was born, developed, and manifest.

The text should include the following 2 items:

  1. A 1-2 sentence project description. 
  2. A 1-2 paragraph brief for your project based on the description below.. The primary purpose of the text is to explain, entice, and convince the reader that your project is amazing and important. Imagine your project on display in the Museum of Modern Art. The text of your post is hanging on the wall next to your work. In 1-2 paragraphs, a viewer should understand what your project is, why it exists, and how you made it. More importantly, the viewer should be interested and care. You will draw them into your project through a compelling narrative.

Things to think about:

  • The what is a clear statement of the thesis or problem+solution.
  • The why explains how your project changes the world. It is the reason your project exists – what social issue is it engaging, who is your project helping, how does the project change the world, and what important social, intellectual, or technical questions does it raise?
  • The how briefly explains what technical prowess, innovative methods, or cool materials you used in your solution.

Here is an example from Penelope the Pain-O-Monster:

Pediatricians and other doctors find it challenging to collect accurate self reported information from children about their level of pain due to lack of communication skills, fear, anxiety, and discomfort. Traditional 1-10 pain scales do not fully address these issues, often leading to uncomfortable children and inaccurate symptom information. Penelope the Pain-O-Monster is a cute plush toy that uses integrated pressure sensors to allow children to express their source and level of pain through play.     

Our previous project, The EmoOwl, helped children with autism to express themselves by translating motion into color. As we sought to expand our children’s health menagerie, we thought about making a different stuffed animal to help kids in hospitals. We quickly realized that the pain charts that patients used to express their pain could be made more interactive and easier for a child to use. We read that playing with stuffed animals can take the children’s mind off the pain so we created an additional “Fun” mode to distraction from pain and anxiety. The handcrafted stuffed animal uses force sensors in different body parts that light up from blue to red depending on how hard they are pushed to show the child’s pain level. It is our hope that Penelope will help sick children feel safer while providing more useful information to care providers. We anticipate that Penelope and the EmOwl will soon have many more friends to help improve healthcare for kids.


2nd Post: Video

Upload a short video showing your project in action. Do not count on your project working as you expect during the presentation.

R/C to Arduino Setup

Aaron Laniosz
Adafruit_Motor_Shield_V2_Library.zip
EnableInterrupt.zip
RCPulseIn.zip